Emailing is known to be the most important business communication method. Moreover, email has become more convenient for companies to interact with their clients. Similarly, QuickBooks allows its users to send their clients invoices, reports, and emails.
But, at times, users might get stuck with QuickBooks not sending emails issues while trying to send the emails. Are you also searching for the query why I am unable to send email? If that’s so, then this is the perfect blog you are looking for. Read this entire post thoroughly and get the simple solutions to figure out this issue.
Have you stumbled upon QuickBooks not sending emails issue and couldn’t continue your ongoing operations? Ring us at +1-833-460-2030 and get in touch with our professionals to obtain immediate help.
Factors that Instigate “Email Not Sending in QuickBooks” Issue
There are multiple factors that give rise to the Email Not Sending in QuickBooks issue. However, updating yourself regarding potential causes is mandatory to resolve the issue efficiently.
The reasons that might cause this error are as follows;
- Problem with the installation of QuickBooks.
- Sometimes, it could happen when the Outlook application is previously running in the background, which stops you from sending emails.
- In other instances, it may evoke due to the damage in the Mapl32.dll.
- Inappropriate email settings are also a major cause of this error.
- You haven’t installed the Outlook application properly on your device.
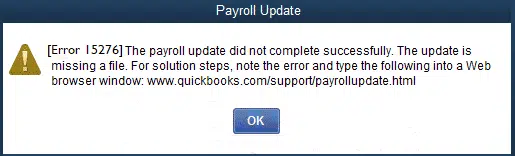
Read Also:- What To Do When QuickBooks Payroll Update Not Working
Essential Factors to Verify Before Fixing QuickBooks Unable to Send Emails Issue
Before you carry on with the troubleshooting methods, it is essential to consider the following points in your mind.
- Look that you are well-connected with a stable and a reliable internet connection.
- Also, you must cross-check the email settings in QuickBooks.
- Confirm that you have already prepared the backup of the QuickBooks data file.
- At last, you must verify that the QuickBooks version you are using is compatible with your operating system.
Solutions To Resolve Unable To Send Emails From QuickBooks Issue?
Are you trying to figure out how to come out of the Unable to Send emails From QuickBooks issue? If you are facing such kind of issue, then don’t take much stress. Instead, look at the effective troubleshooting methods below to instantly wipe out the issue. Thus, it would help you in emailing your clients without getting any technical glitches.
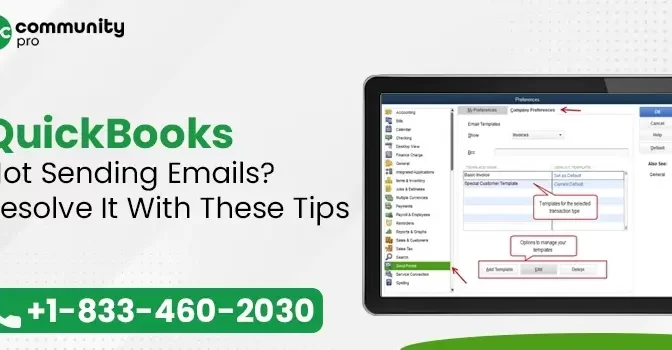
Solution 1: Confirm that Email Preferences Have Been Set Properly in QuickBooks
To cross-check the email preferences in QuickBooks, you must carry on with the instructions below.
- In the first place, launch the QuickBooks Desktop application on your device.
- After this, hover your cursor over the “Edit menu followed by Preferences”.
- Moving ahead, navigate to the “Send Forms tab”, and under the “My Preferences tab”, pick the accurate option for sending email. Later on, hit the “OK” button to proceed further.
- Thereon, choose the “Outlook Email option” beneath the “My Preferences tab” when you operate Outlook to send emails.
- Furthermore, you must shut down the “QuickBooks window” and relaunch your device.
- Finally, try to “relaunch the QuickBooks application” and try whether you can send the email. If the issue persists, move on to the next resolution method.
Solution 2: Get the MAPI32.dll File Repair
Sometimes, the damage found in the MAPI32.dll file is a major reason for QuickBooks not sending emails. To resolve the issue, it is best to repair the file by following the steps as instructed below.
Examine that the MAPI32.dll is Working Appropriately
- Begin the process by “relaunching Windows” and opening the Word file with a new document.
- In the next step, you must look beneath the “File menu” and tap on Send option, followed by the “Email As PDF Attachment” option.
- If you spot that you won’t encounter any errors while launching the email,
- On the other hand, if you find any issue, then try to repair the damage in the MAPI32.dll file.
Rectify the Issues With the MAPI32.dll
- Firstly, hit the Windows key on your keyboard and include “C: >> Windows >> System32” into the search box.
- After this, navigate and tap on the Fixmapi.exe file and go through the instructions displayed on-screen to repair the file.
- Thereon, restart your Windows computer once the file is repaired and try to send the email once again.
- Even after repairing the file you couldn’t fix the issue, try modifying the MAPI32.dll file name using the steps below.
Assign a New Name to the MAPI32.dll File
- First of all, you must try to restart your Windows device and hit the Windows key to bring up the “Search Programs and Files search box”.
- You are supposed to include “C: >> Program Files (X86) >> Common Files >> System >> MSMAPI >> 1033”. Later on, hit the Enter key on your keyboard to move further.
- Afterwards, locate and “right-tap on the file named MAPI32.dll file” in the folder and pick the “Rename option”.
- Now, you must “assign a new name” to the file by including “.OLD” at the end of the file name. The file name will be represented as MAPI32.dll.OLD.
- Relaunch the Windows and try to run the “Fixmapi.exe” file.
- Once the process is over, relaunch the Windows once again.
Solution 3: Review the Email Settings in Internet Explorer
- In the beginning, “launch Internet Explorer” and hit the “Gear” icon from the top-right corner to open the settings drop-down menu.
- Thereon, tap on the Tools option followed by “Internet Options”.
- Now, beneath the “Programs” tab, examine whether the Outlook is picked as the default program while sending the emails.
- Afterwards, navigate to the “Apply option” followed by the “OK” button
- In the end, “shut down the Internet Explorer” and launch the QuickBooks application to send the emails.
Read Also:- Troubleshooting Email Issues In QuickBooks
Final Thoughts!!
QuickBooks not sending email issues may be challenging for some users as it might disrupts them in their ongoing tasks. However, you can easily come out of this issue with ease by applying the troubleshooting methods discussed above. For further queries, you can connect with our highly-trained professionals for immediate help via live chat or email support facility.